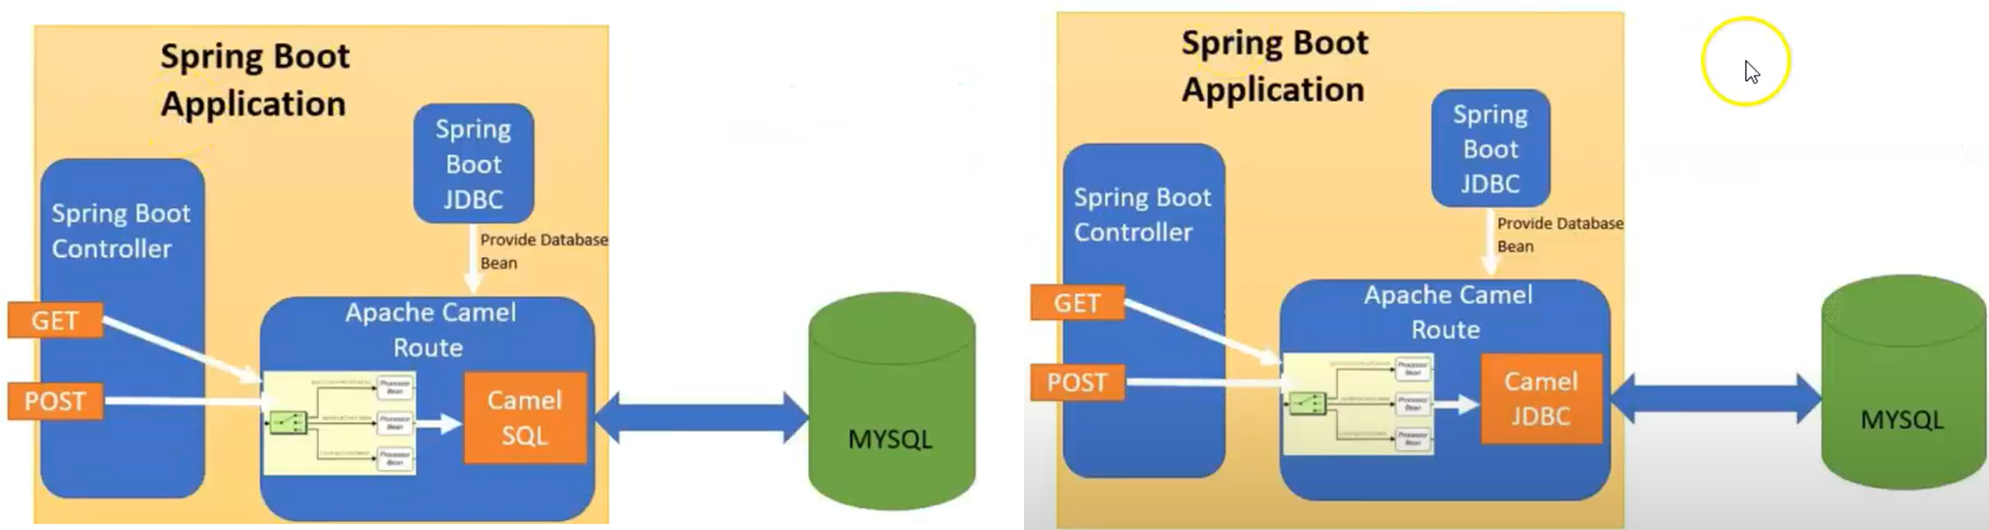
We will be making use of Spring Boot and Camel SQL Component for inserting and retrieving records from MySQL
The SQL component allows you to work with databases using JDBC queries.
The SQL component allows you to work with databases using JDBC queries.
The difference between this component and JDBC component is that in case of SQL the query is a property of the endpoint and it uses message payload as parameters passed to the query.
So it is much easier to use parameterized queries. In case of the scenes for the actual SQL handling, while JDBC component uses the standard JDBC API.
So Camel SQL component is much advanced as we can also make use of features like Spring transaction
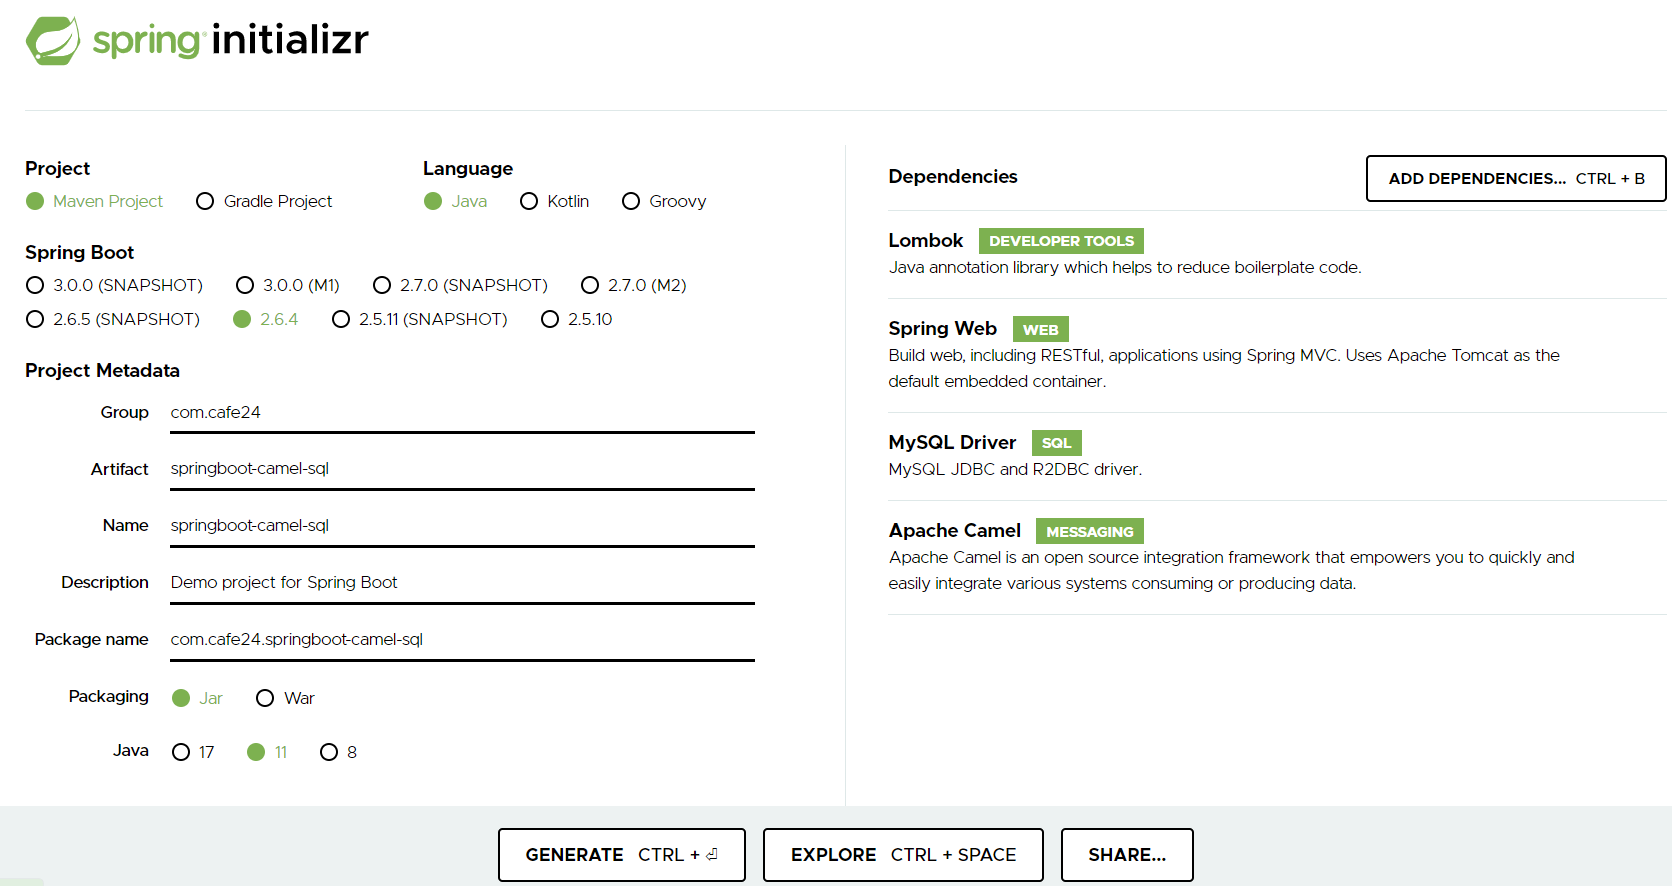
Gradle Project 생성 및 의존성, DB 설정 (application properties)
- Spring Web, Apche Camel, MySQL Driver dependency 추가
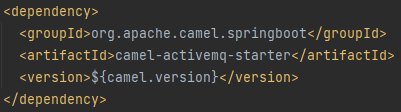
- Camel-SQL component dependency 추가
. SQL component는 camel core에 포함되어있지 않으므로 따로 추가해주어야 함
<dependency>
 <groupId>org.apache.camel</groupId>
 <artifactId>camel-sql</artifactId>
 <version>${camel.version}</version>
</dependency>
- application properties에 MySQL 연결 설정
. createDatabaseIfNotExist: DB가 없으면 자동으로 생성해주는 설정
. local에 설정한 username/password가 정확해야 함
spring.datasource.url=jdbc:mysql://localhost:3306/bootdb?createDatabaseIfNotExist=true
spring.datasource.driver-class-name=com.mysql.cj.jdbc.Driver
spring.datasource.username=root
spring.datasource.password=0103
spring.datasource.platform=mysql
spring.datasource.initialization-mode=always
- schema-mysql.sql 파일 생성
. Spring Boot JDBC가 resources/schema-mysql.sql script를 읽어들여 자동으로 table을 생성해준다
DROP TABLE IF EXISTS employee;

CREATE TABLE employee (
  empId VARCHAR(10) NOT NULL,
  empName VARCHAR(100) NOT NULL
);
Domain, Service, Controller Class 구성
- Employee Domain Class 생성
@Getter
@Setter
@ToString
public class Employee {

    private String empId;
    private String empName;

}
- Service Class 생성
. Camel Routebuilder를 상속받아 camel route를 정의하는 class
. Autowiring the datasource been created for us b y Spring Boot JDBC
. Spring Boot Controller가 받은 Http 요청을 Service Class에서 처리
@Service
public class EmployeeService extends RouteBuilder {

    @Autowired
    DataSource dataSource;

    public DataSource getDataSource() {
        return dataSource;
    }

    public void setDataSource(DataSource dataSource) {
        this.dataSource = dataSource;
    }

    // define the SQL Component bean which will be used as an endpoint in our route
    @Bean
    public SqlComponent sql(DataSource dataSource) {
        SqlComponent sql = new SqlComponent();
        sql.setDataSource(dataSource);
        return sql;
    }

    @Override
    public void configure() throws Exception {
        //Insert Route
        from("direct:insert").log("Processing message ").setHeader("message", body()).process(
            new Processor() {
                @Override
                public void process(Exchange exchange) throws Exception {
                    //take the Employee object from the exchange and create the parameter map
                    Employee employee = exchange.getIn().getBody(Employee.class);
                    Map<String, Object> employeeMap = new HashMap<>();
                    employeeMap.put("EmpId", employee.getEmpId());
                    employeeMap.put("EmpName", employee.getEmpName());
                    exchange.getIn().setBody(employeeMap);
                }
            }).to("sql:INSERT INTO employee(EmpId, EmpName) VALUES (:#EmpId, :#EmpName)");
        //Select Route
        from("direct:select").to("sql:select * from employee").process(
            new org.apache.camel.Processor() {
                @Override
                public void process(Exchange exchange) throws Exception {
                    //the camel sql select query has been executed. We get the list of employees.
                    ArrayList<Map<String, String>> dataList = (ArrayList<Map<String, String>>) exchange.getIn()
                        .getBody();
                    List<Employee> employees = new ArrayList<Employee>();
                    System.out.println(dataList);
                    for (Map<String, String> data : dataList) {
                        Employee employee = new Employee();
                        employee.setEmpId(data.get("empId"));
                        employee.setEmpName(data.get("empName"));
                        employees.add(employee);
                    }
                    exchange.getIn().setBody(employees);
                }
            });
    }
}
. POST(insert) 요청은 direct component(direct:insert)로 연결 → exchange에서 Employee 객체 정보를 꺼내서 parameter map 생성하고 exchange에 parameter map을 set해준다
. GET(select) 요청은 direct component(direct:select)연결하여 별도의 processing 없이 DB로 query를 날리게 되고, query가 실행된 후에 select 결과를 exchange에 담는다
- Controller Class 생성
. ProducerTemplate 를 사용해서 Camel Route를 호출하게 됨
@RestController
public class EmployeeController {
@Autowired
ProducerTemplate producerTemplate;
@RequestMapping(value = "/employees", method = RequestMethod.GET)
public List<Employee> getAllEmployees() {
List<Employee> employees = producerTemplate.requestBody("direct:select", null, List.class);
return employees;
}
@RequestMapping(value = "/employees", consumes = "application/json", method = RequestMethod.POST)
public boolean insertEmployee(@RequestBody Employee employee) {
producerTemplate.requestBody("direct:insert", employee, List.class);
return true;
}
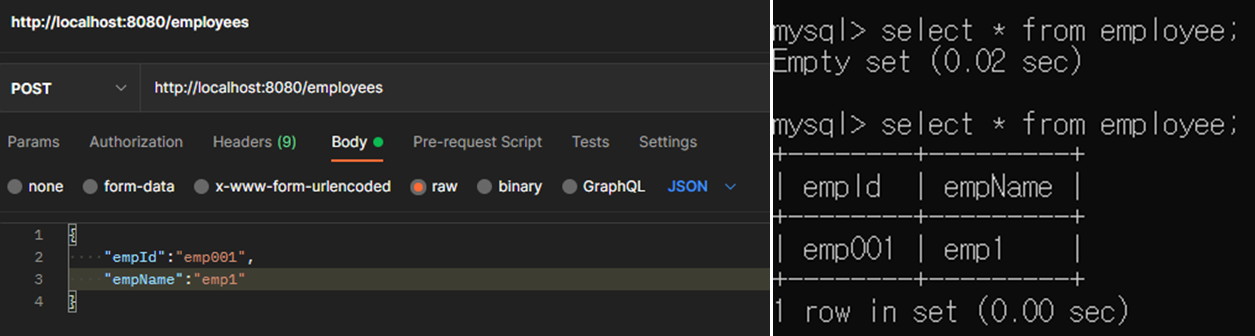
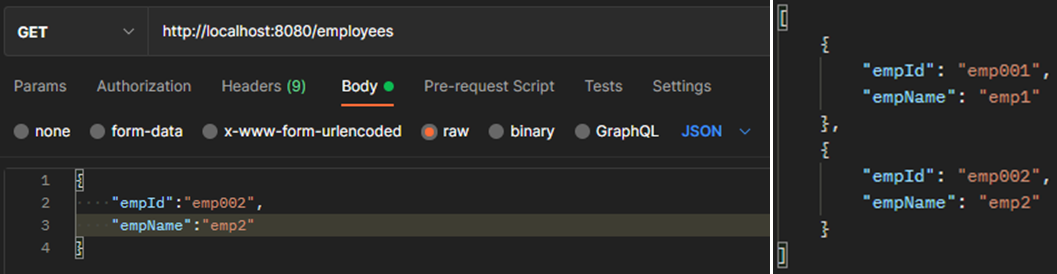
}API TEST
. POSTMAN으로 GET/POST 요청 후 결과 확인
'~2022 > Camel with Spring-Boot' 카테고리의 다른 글
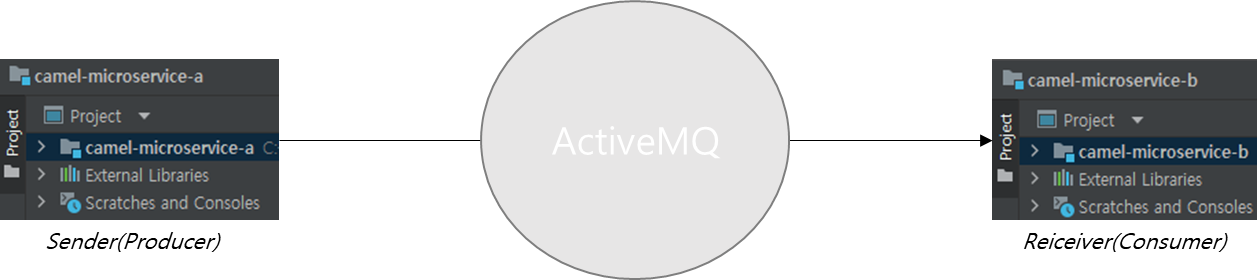
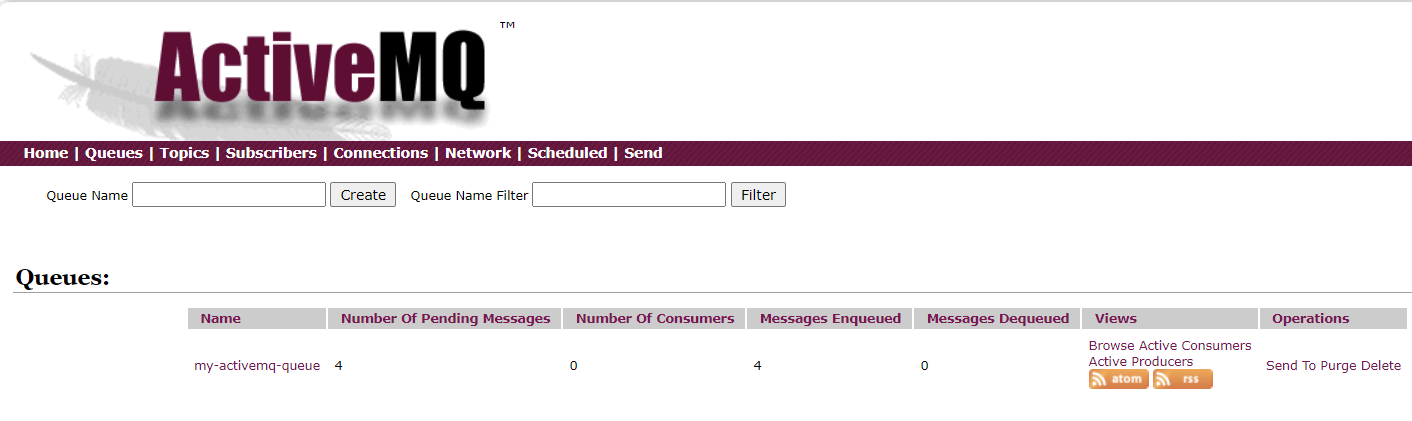
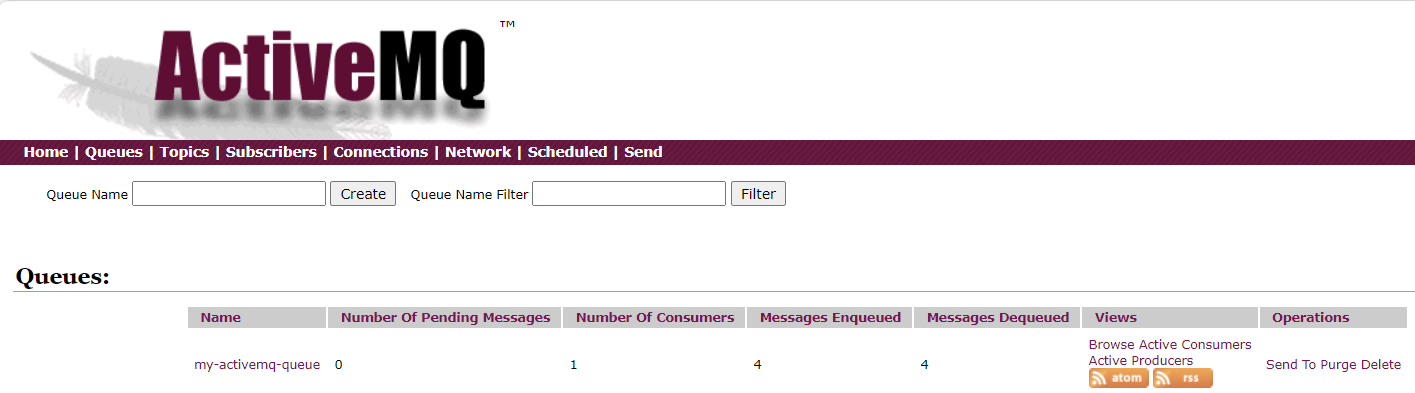
| [Camel Tutorial] Simple ActiveMQ Router (0) | 2022.03.12 |
|---|---|
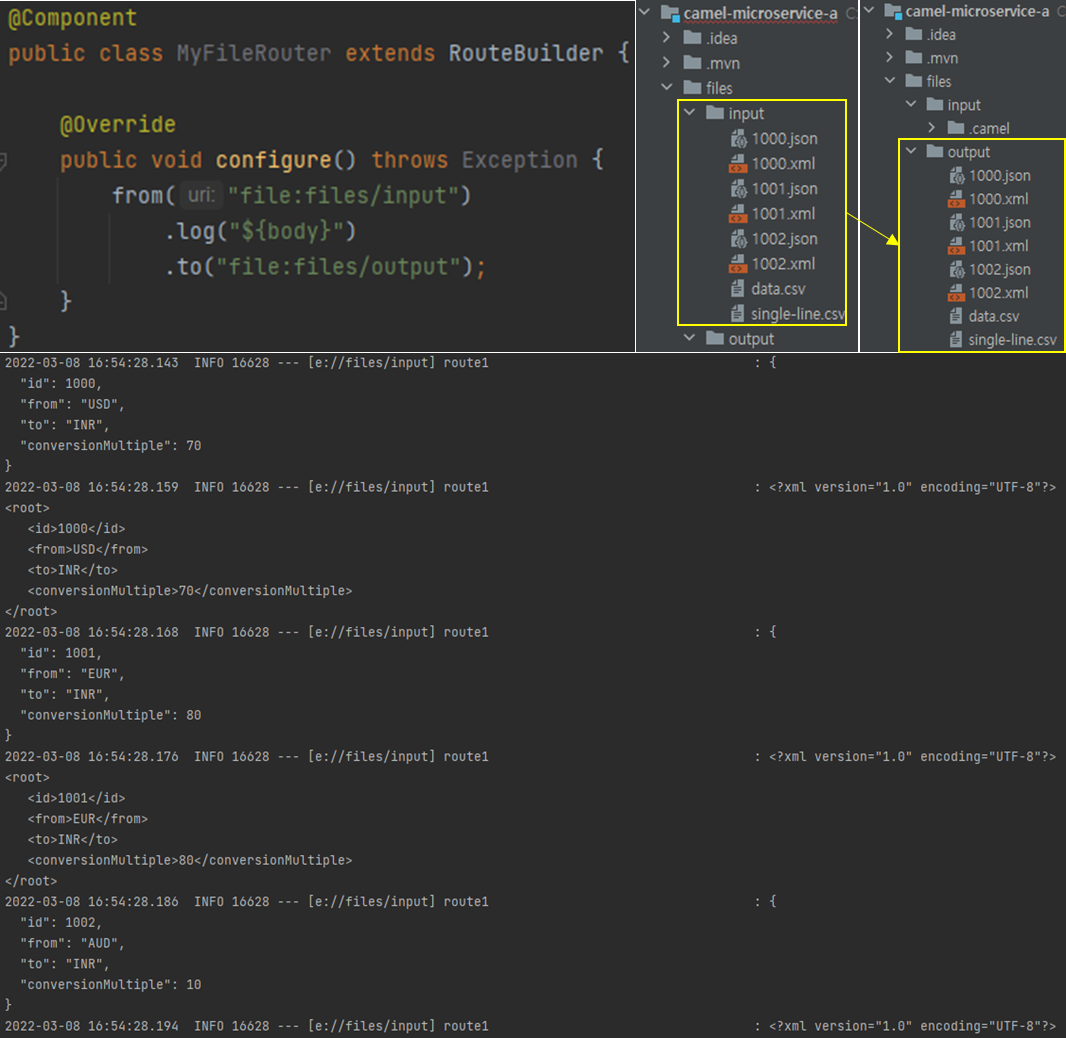
| [Camel Tutorial] Simple File Router (0) | 2022.03.12 |
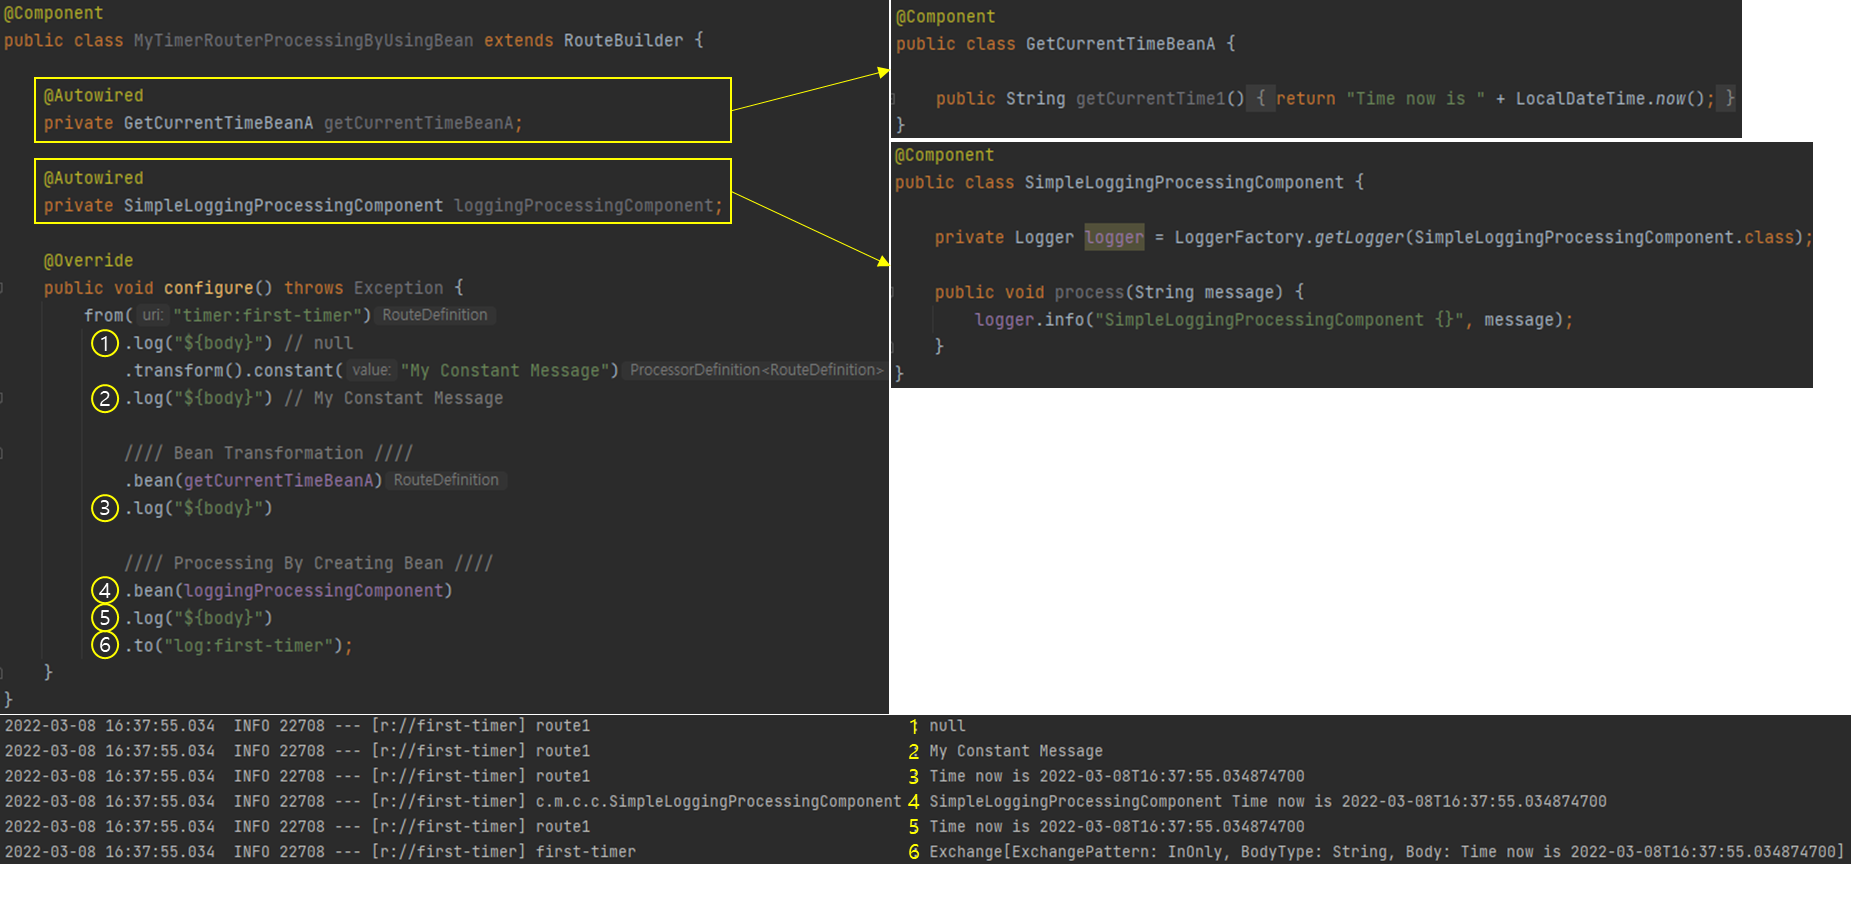
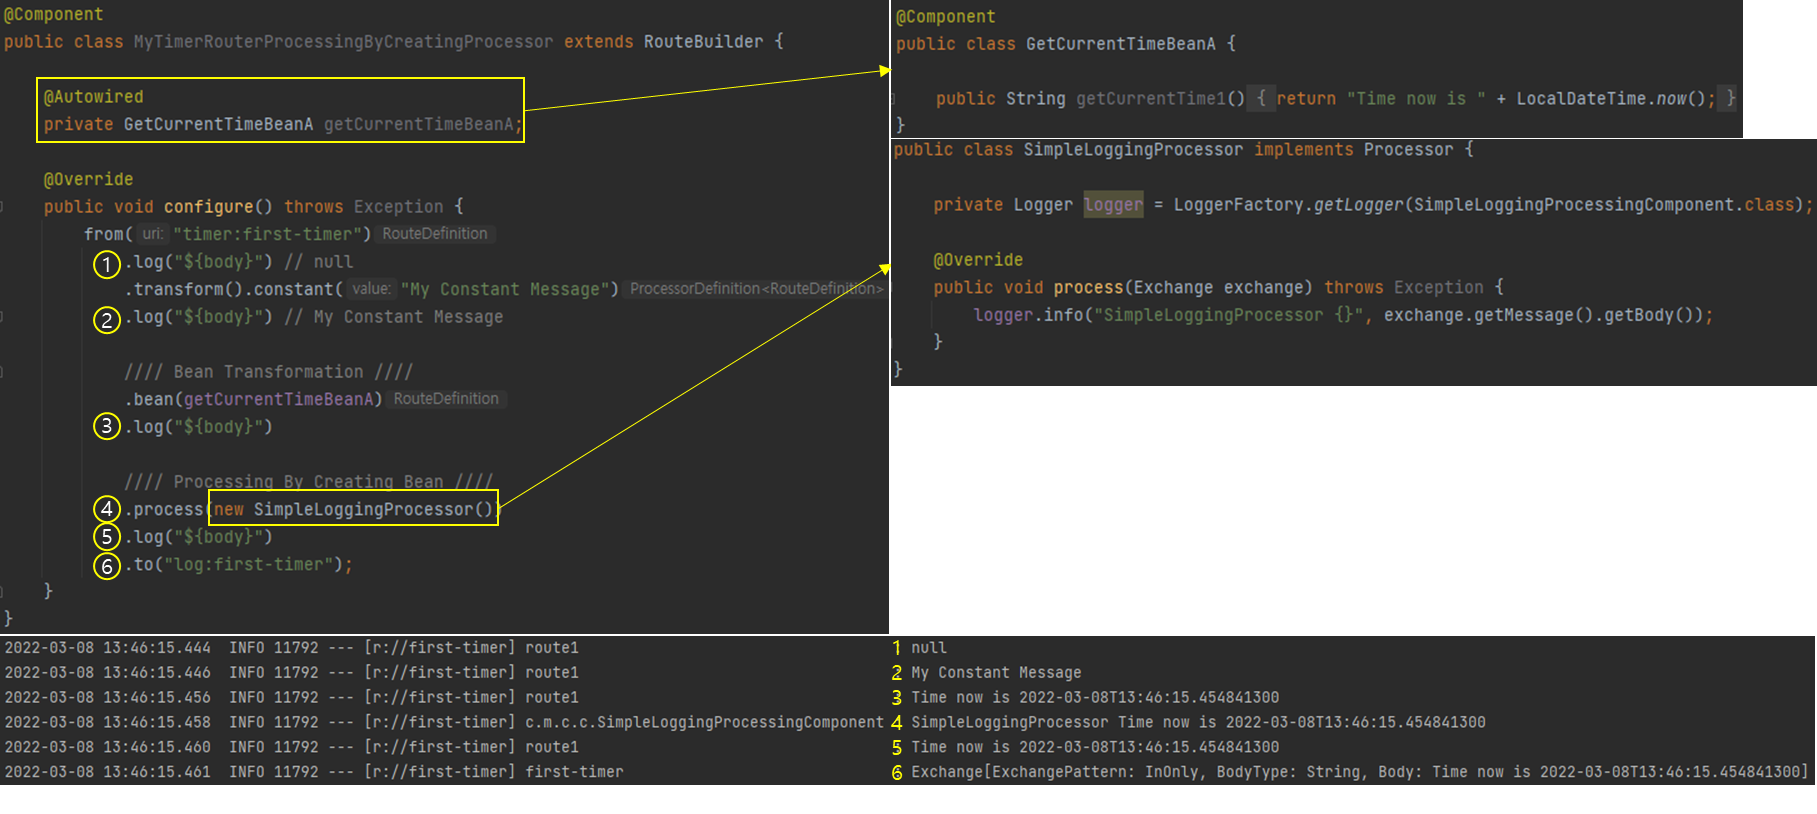
| [Camel Tutorial] Message Transformation & Message Processing (0) | 2022.03.12 |
| [Camel Tutorial] Simple Timer Router (0) | 2022.03.12 |
| [Camel Tutorial] Generate Spring Boot Project (0) | 2022.03.12 |